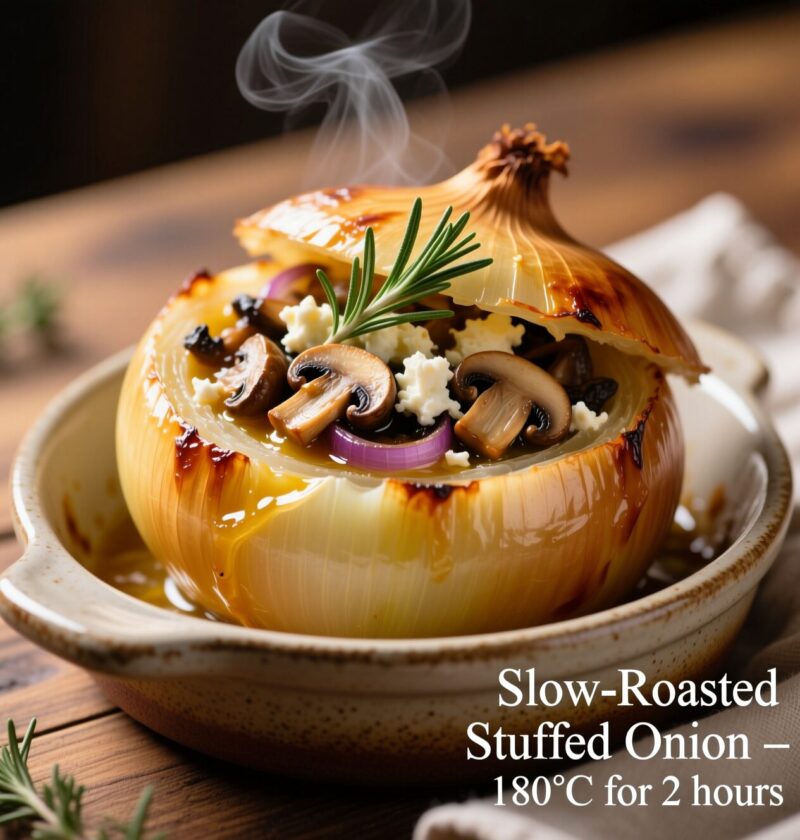
Whole Slow-Roasted Stuffed Onion: The Comfort Food Hero Your Dinner Table Has Been Missing
Listen, I get it – when you hear “stuffed onion,” your first thought probably isn’t “wow, that sounds amazing!” But stick with me here, because I’m about to tell you about one of the most surprisingly delicious dishes I’ve ever stumbled across. The whole slow-roasted stuffed onion turned my skeptical taste buds into complete believers, and honestly? It might just become your new favorite comfort food.
I discovered this gem during a particularly uninspiring week when my fridge contained exactly three sad onions and whatever random ingredients I could scrounge up. What started as desperate meal planning ended up being pure culinary gold. Who knew that humble onions could transform into something so elegant and satisfying?
What Makes Whole Slow-Roasted Stuffed Onions So Special?
You might wonder what all the fuss is about – after all, we’re talking about onions here. But here’s the thing: when you slow-roast a whole onion, something magical happens. The harsh bite disappears, replaced by this incredible sweetness that caramelizes throughout the entire bulb.
The stuffing takes things to another level entirely:
- Savory fillings create amazing flavor contrasts
- Slow cooking makes the onion tender and sweet
- Impressive presentation that looks way fancier than the effort required
- Versatile base that works with countless ingredient combinations
The result? A dish that tastes like you spent hours in the kitchen but actually requires minimal hands-on work. The onion becomes this perfect edible bowl that holds whatever delicious filling you dream up.
Why Slow-Roasted Stuffed Onion Changes Everything!
Ever notice how onions go from sharp and pungent to sweet and mellow when you cook them? That transformation gets amplified when you slow-roast whole onions. The gentle heat breaks down those sulfur compounds that make raw onions so aggressive.
The Science Behind the Sweetness of Slow-Roasted Stuffed Onion
During slow roasting, the onion’s natural sugars concentrate and caramelize. The outer layers protect the inner portions from drying out, creating this amazing gradient from deeply caramelized outside to tender, sweet inside.
I used to think caramelized onions were the peak of onion perfection. Then I tried a whole slow-roasted one, and honestly, there’s no comparison. The texture alone will blow your mind.
Temperature and Timing That Actually Works
Most recipes tell you to roast at high heat, but that’s where they go wrong. Low and slow is the secret here:
- 325°F (165°C) creates the perfect environment
- 60-90 minutes depending on onion size
- No need to constantly check or flip
The gentle heat gives the onion time to transform without burning the outside before the inside cooks through.
Choosing the Right Onions for Slow-Roasted Stuffed Onion
Not all onions work equally well for this technique, and I learned this the hard way. My first attempt used regular yellow onions, and while they were okay, they weren’t spectacular.
Best Onion Varieties
Sweet onions like Vidalia or Walla Walla are absolute game-changers. They have less sulfur to begin with, so they become incredibly mild and sweet when roasted. Plus, they’re usually larger, which gives you more room for stuffing.

Spanish onions work great too – they’re big, mild, and hold their shape beautifully during the long cooking process. Red onions can work, but they tend to be smaller and have stronger flavors that some people find overwhelming.
Size Matters More Than You Think
You want onions that are at least 3-4 inches in diameter. Smaller onions don’t leave enough room for interesting fillings, and they can overcook before the stuffing heats through properly.
I always buy onions that feel heavy for their size – this usually means they’re fresh and have good moisture content, which helps prevent them from drying out during roasting.
Why Slow-Roasted Stuffed Onion Are Totally Worth the Effort
Let me guess—you’re asking, “Why should I slow roast an onion for an hour when I could microwave a potato in five minutes?” Fair question. But hear me out:
🔥 Slow-roasting = maximum flavor
When you roast an onion low and slow, it goes through this magical transformation:
- The harsh bite mellows out.
- The natural sugars caramelize.
- The texture turns soft, almost creamy on the inside.
It’s like the onion becomes its best self after some alone time in the oven. Don’t we all?
💡 They’re versatile AF
You can stuff them with just about anything:
- Grains: quinoa, rice, farro
- Proteins: sausage, lentils, tofu, shredded chicken
- Cheese: goat cheese, feta, parmesan—go wild
- Veggies: mushrooms, spinach, sun-dried tomatoes, bell peppers
It’s basically a blank canvas with flavor built in.
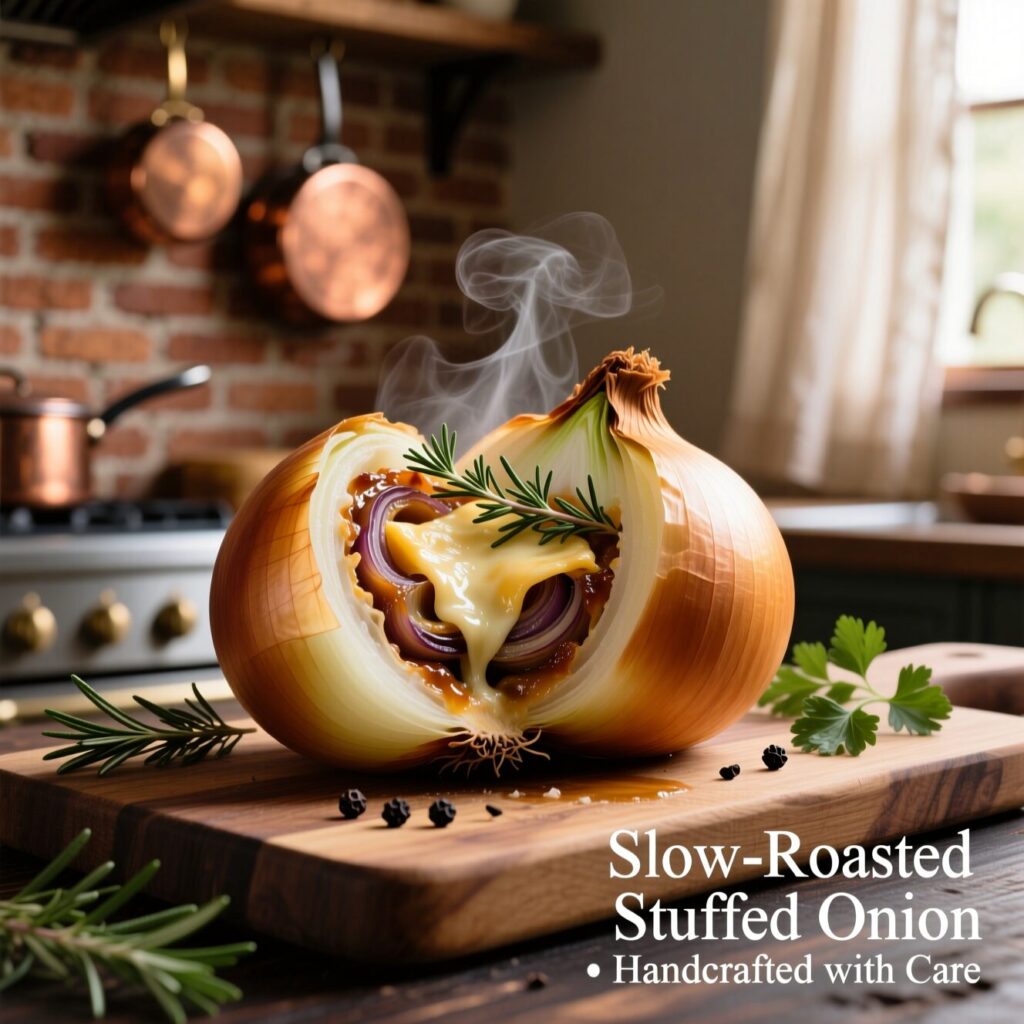
🍽️ And bonus: They look fancy Slow-Roasted Stuffed Onion
Like, restaurant-fancy. No one needs to know you made them in sweatpants.
What You’ll Need (No Weird Ingredients, Promise) Slow-Roasted Stuffed Onion
Let’s keep it simple and customizable. Here’s what I use for a classic vegetarian version that never disappoints.
🧅 Main Ingredients:
- 4 large yellow onions (they hold up best)
- 2 tbsp olive oil
- Salt & pepper, to taste
🍄 Stuffing Base:
- 1 cup cooked quinoa (or rice)
- 1 cup finely chopped mushrooms
- 2 cloves garlic, minced
- ½ tsp dried thyme
- ¼ cup chopped walnuts (optional crunch)
- ¼ cup grated parmesan or crumbled feta
- Fresh parsley, for garnish
🧈 Optional extras:
- Breadcrumbs for a crispy topping
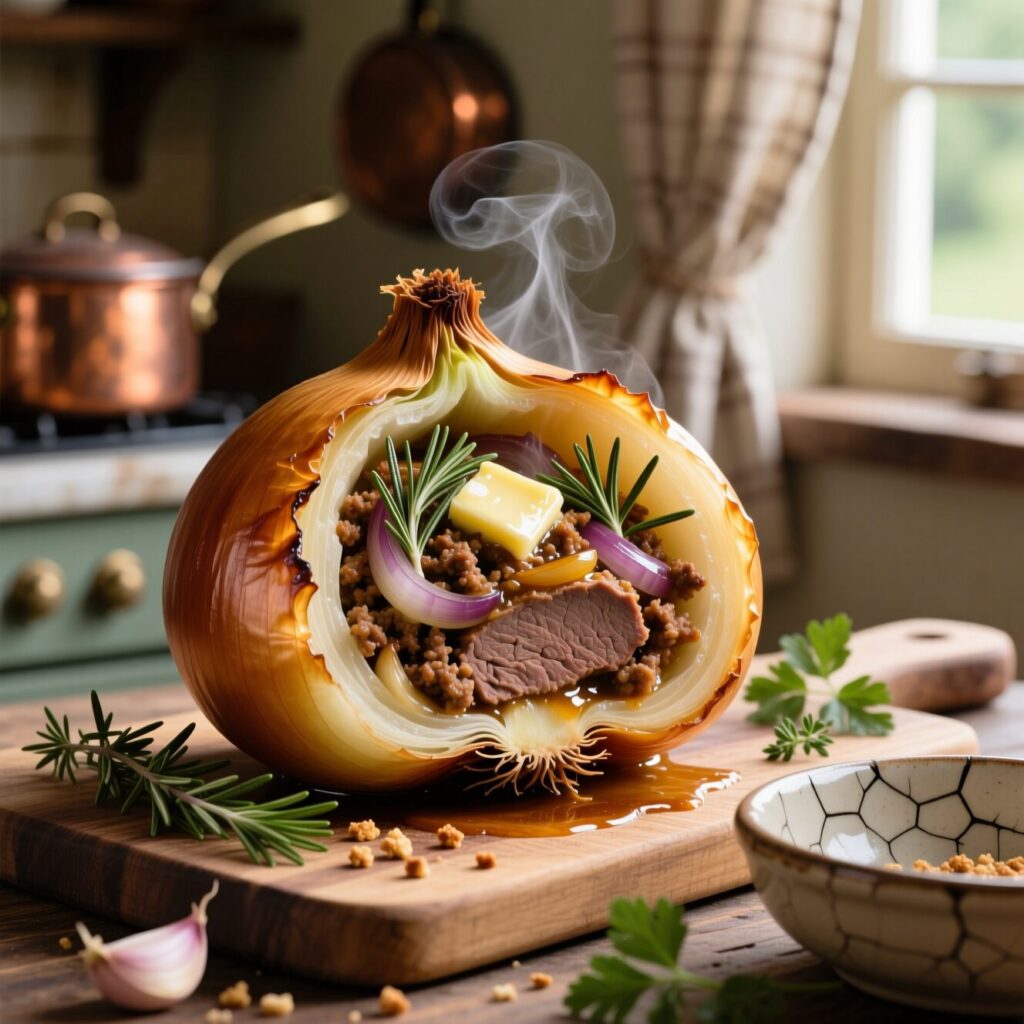
- Sausage or ground turkey if you want to go meaty
- Hot sauce if you like a little kick (you know I do)
How to Make Slow-Roasted Stuffed Onions (Step-by-Step)
Ready to roast? Here’s the lowdown on how to make this happen without losing your sanity.
Step 1: Prep the Onions
- Preheat your oven to 375°F (190°C).
- Cut about ½ inch off the top of each onion and just enough off the bottom to make it sit flat (don’t cut too much—you want it intact).
- Use a spoon or melon baller to carefully scoop out the center of each onion, leaving 2–3 layers around the outside to form a “shell.”
- FYI: You’ll cry a little. It’s part of the process.
Step 2: Roast the Onion Shells
- Rub the hollowed-out onions with olive oil, salt, and pepper.
- Place them in a baking dish, cover loosely with foil, and roast for 25–30 minutes until just tender.
- Meanwhile, chop up the scooped-out onion insides for the filling.
Step 3: Make the Filling
In a skillet:
- Heat 1 tbsp olive oil over medium heat.
- Sauté the chopped onion cores and mushrooms for 8–10 minutes until soft and slightly browned.
- Add garlic, thyme, salt, and pepper.
- Stir in cooked quinoa, walnuts, and cheese. Taste it. Then taste it again (chef’s tax).
Step 4: Stuff & Roast Again
- Spoon the filling into the roasted onion shells—really pack it in.
- Top with breadcrumbs and a drizzle of olive oil if you’re feeling extra.
- Bake uncovered for another 20–25 minutes until the tops are golden and the onions are melt-in-your-mouth soft.
Garnish with fresh parsley and serve immediately. Or sneak one before anyone else sees—your call.
Variations That’ll Blow Your Mind (Or At Least Your Tastebuds)
Once you try these once, you’ll want to remix them every week. Here are a few crowd-pleasers:
🧄 Garlic-Lovers Stuffed Onion
- Add roasted garlic to the filling.
- Use garlic-infused olive oil for the top.
- Maybe breathe on no one for the next 24 hours.
🐔 Chicken Alfredo Style
- Fill onions with shredded chicken, alfredo sauce, and mozzarella.
- Bake until bubbling.
- Pair with pasta if you want full-on indulgence.
🌱 Vegan Powerhouse
So good you won’t miss the dairy (and that’s saying something, IMO).
Use lentils instead of cheese or meat.
Toss in roasted veggies and top with herby tahini sauce.
Cooking Techniques That Guarantee Success
The actual cooking process is pretty straightforward, but small details make huge differences in the final result.
The Foil Tent Method
I always start my stuffed onions covered with foil for the first 45 minutes. This creates a gentle steaming environment that helps the onion cook evenly without the stuffing browning too quickly.
Remove the foil for the last 15-30 minutes to get that gorgeous golden top on your stuffing. The timing depends on your specific stuffing ingredients – cheese-based fillings brown faster than breadcrumb ones.
Liquid Love
Here’s a trick most recipes skip: add a splash of broth or wine to the bottom of your roasting pan. Not enough to create a bath, just enough to prevent sticking and add some moisture to the cooking environment.
The liquid also picks up all those caramelized bits from the onion, creating an amazing pan sauce you can drizzle over the finished dish.
Troubleshooting Common Problems
Let me save you from the mistakes I made when I first started making these. Learn from my kitchen disasters 🙂
When Onions Fall Apart
If your onions are falling apart during prep, they’re either too old or you’ve removed too many layers. Fresh onions hold together better, and you need at least 2-3 outer rings to maintain structure.
Stuffing That’s Too Dry
Dry stuffing is usually the result of not adding enough moisture or fat. Your mixture should hold together when squeezed but not be soggy. Add liquid gradually – you can always add more, but you can’t take it back.
Uneven Cooking
This usually happens when onions are different sizes or when your oven has hot spots. Rotate the pan halfway through cooking, and if you’re making multiple onions, try to choose ones that are similar in size.
Serving and Presentation Ideas
These beauties are naturally impressive, but a few simple touches can make them absolutely restaurant-worthy.
As a Main Course
Pair with a simple green salad and some crusty bread. The onions are rich and satisfying enough to be the star of the meal, especially with heartier stuffings like the sausage version.
As an Elegant Side
Cut larger stuffed onions into wedges and serve alongside roasted meats. The sweet, caramelized flavor complements everything from roasted chicken to grilled steak.
Make-Ahead Magic
You can prep these completely and refrigerate for up to a day before cooking. Just add an extra 10-15 minutes to the cooking time if you’re starting from cold.
Seasonal Variations That Keep Things Interesting
The base technique stays the same, but switching up your stuffings keeps this dish exciting year-round.
Spring Version
Fresh peas, mint, and goat cheese create this amazing light, fresh flavor that celebrates spring produce. Add some lemon zest to brighten everything up.
Summer Take
Tomatoes, fresh basil, and mozzarella turn these into something like a deconstructed caprese salad. Use the best tomatoes you can find – it makes all the difference.
Winter Comfort
Root vegetables, dried cranberries, and sage create the ultimate cold-weather comfort food. I like adding some toasted pecans for crunch and richness.
Why Slow-Roasted Stuffed Onion Wins Over Skeptics
I’ve served these to confirmed onion-haters and watched them go back for seconds. There’s something about the transformation that happens during slow roasting that even converts the most stubborn anti-onion people.
The presentation factor doesn’t hurt either. These look so elegant and intentional that people assume you’re some kind of culinary genius. Little do they know you basically just stuffed some onions and let the oven do all the work.
Storage and Reheating Tips
Leftover stuffed onions (if you’re lucky enough to have any) reheat beautifully. Cover with foil and warm in a 325°F oven for about 15 minutes. The microwave works in a pinch, but you’ll lose some of that nice texture contrast.
They keep in the fridge for 3-4 days, and honestly, they’re almost as good reheated as they are fresh. IMO, the flavors actually meld together even better after a day 🙂
Final Thoughts
The whole slow-roasted stuffed onion might sound like an odd choice for your next dinner party, but trust me on this one. It’s the kind of dish that surprises people in the best possible way – impressive enough for special occasions but simple enough for weeknight dinners.
Whether you’re looking to use up some lonely onions in your pantry or want to try something completely different, this technique delivers every single time. Plus, you’ll have the satisfaction of serving something that looks incredibly sophisticated while knowing it was actually pretty easy to make.
Slow-Roasted Stuffed Onion Slow-Roasted Stuffed Onion Slow-Roasted Stuffed Onion Slow-Roasted Stuffed Onion Slow-Roasted Stuffed Onion Slow-Roasted Stuffed Onion Slow-Roasted Stuffed Onion Slow-Roasted Stuffed Onion Slow-Roasted Stuffed Onion Slow-Roasted Stuffed Onion Slow-Roasted Stuffed Onion Slow-Roasted Stuffed Onion Slow-Roasted Stuffed Onion Slow-Roasted Stuffed Onion.


Proudly powered by WordPress